Revox B77/PR99 Remote Ver 3 Instructions
Revox B77/PR99 Remote
Ver 1 Instructions
Revox B77/PR99 Remote Ver 4 Instructions
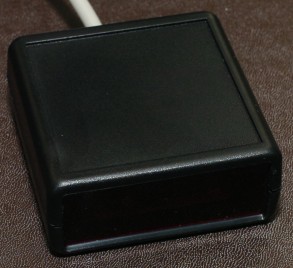

Installation: Turn off the power to the tape deck. Plug the remote adapter into the remote connector on the top or back of the tape deck. Now power can be turned back on. The light on the front of the remote adapter should be on.
The remote adapter controls the standard 6 transport functions: Play, Stop, F.F., Rewind, Record and Pause using any Universal remote programmed for the matching Sony VCR code.
The remote adapter can be programmed to respond to Sony VHS VCR codes or Sony Beta VCR codes. To select between the two there is a jumper inside the unit. Remove the two screws on the bottom of the unit and remove the top cover.
Located near the front window is a jumper labeled JMP. When the jumper block is installed the unit will respond to Sony Beta VCR codes. When the jumper is open the unit will respond to Sony VHS VCR codes.
|
Jumper |
RCA Remote |
|
|
Jumpered |
VCR-119 (Beta VCR) * |
|
|
Open |
VCR-099 (VHS VCR) |
|
* = Default jumper selection
To program the RCA remote press and hold the Code Search button until the red light comes on. Release the Code Search button and momentarily press the VCR-DVD button then enter the 3 digit codes either 119 for Sony Beta VCR or 099 for Sony VHS VCR. The red light should blink after each keypress and go out after the last digit is entered. Press the VCR-DVD button and press one of the transport control buttons (PLAY, STOP, FF, REW, REC or PAUSE). The light on the front of the remote adapter should blink off momentarily. If the light does not blink off try reprogramming the remote or checking the state of the jumper inside the unit.
For instructions on configuring other remotes go to this page and select from the list of tested remotes. Click Here